The Raspberry Pi Zero’s small size isn’t the only thing that makes it an awesome single board computer. Thanks to its ability to be recognized as a USB/Ethernet gadget, you can connect to your Pi from another computer via USB. Power is provided over USB, and your computer’s internet connection is shared over USB too. You no longer need to use a power cord and ethernet cable or WiFi adapter to access your Pi. All that’s needed is a micro USB to USB adapter.
In the past, a serial debugging adapter was needed to configure the Pi as a USB/Ethernet gadget, but with Raspbian Jessie 5-10-16 or later, all you need to do is edit a couple files on the SD card.
This tutorial is based in Windows. You’ll need to install a program called Bonjour on your computer before you can connect to the Pi over USB. Bonjour allows your computer to automatically recognize USB and ethernet devices like printers, scanners, and in this case the Raspberry Pi. Bonjour is packaged with iTunes and Adobe CS software, so it might already be installed on your computer. If it’s not though, you can download and install the stand-alone software here.
This tutorial assumes that you have the SSH client PuTTY already installed on your computer.
Edit the config.txt and cmdline.txt Files
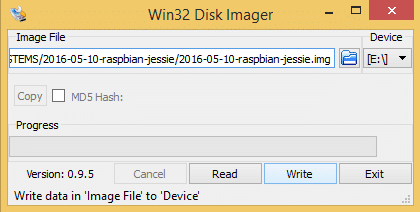
To get started, burn a fresh image of Raspbian Jessie Full or Lite (version 5-10-16 or later) to a micro SD card on your laptop/desktop (see our tutorial How to Set Up a Raspberry Pi Without a Monitor or Keyboard if you need help with this step):
Once that’s finished, navigate to the root directory of the micro SD card (i.e. boot(E:)) and open the file config.txt with Wordpad. Using Notepad to edit the file will make it hard to tell where the line breaks are, and this file uses line breaks to separate the commands. Scroll down to the bottom of the file and add dtoverlay=dwc2 to a new line:
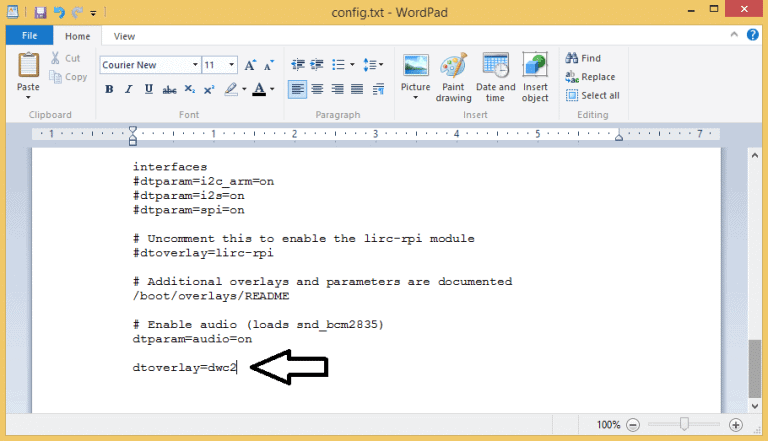
Save and exit the config.txt file.
Now open the cmdline.txt file with Notepad. Make sure “Word Wrap” is off to view the file as a single line. You don’t want to add any line breaks to this file. All of the commands need to be in a single line. If you use Wordpad to edit this file, you may create unintentional line breaks, so using Notepad is best. Scroll across the line and find the command rootwait. After the rootwait command, add modules-load=dwc2,g_ether:
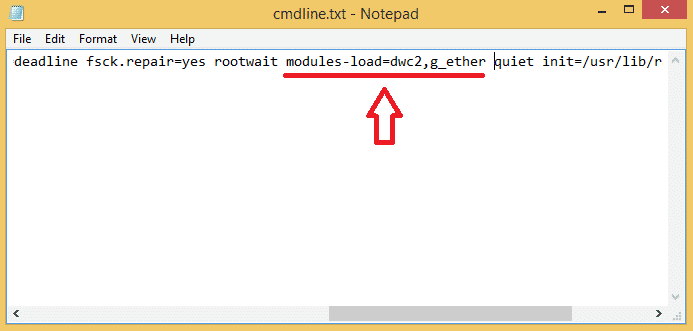
Save and exit the cmdline.txt file.
Now you can eject the SD card from your computer.
Insert your SD card into the Pi Zero, and plug your micro USB to USB adapter (or cable) into the Pi’s micro USB port (not the power connection), and the other end into your computer:

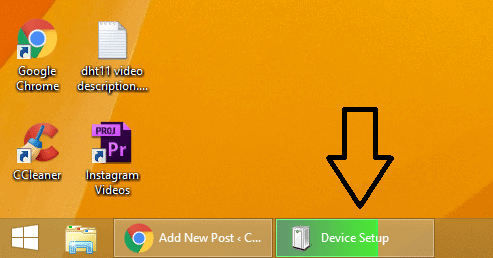
You’ll see that Windows recognizes the Pi, and will attempt to setup the device:
At this point, open PuTTY and try SSHing into the Pi with the address raspberrypi.local:
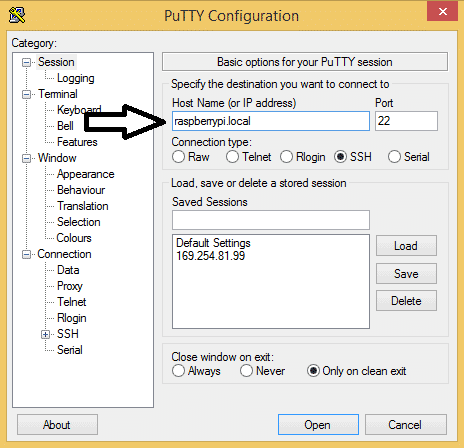
If you can log in to your Pi at this point, that’s good. You can skip the next section, “Install the RNDIS Drivers” and go to the “Setting Up Shared Internet Access” further below.
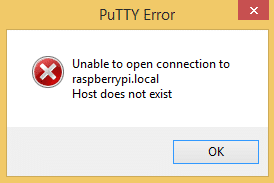
If you do get an error message saying something like “Unable to open connection to raspberrypi.local. Host does not exist”, you’ll just need to install the RNDIS drivers on your computer. I’ll explain how to do this in the next section:
Install the RNDIS Drivers
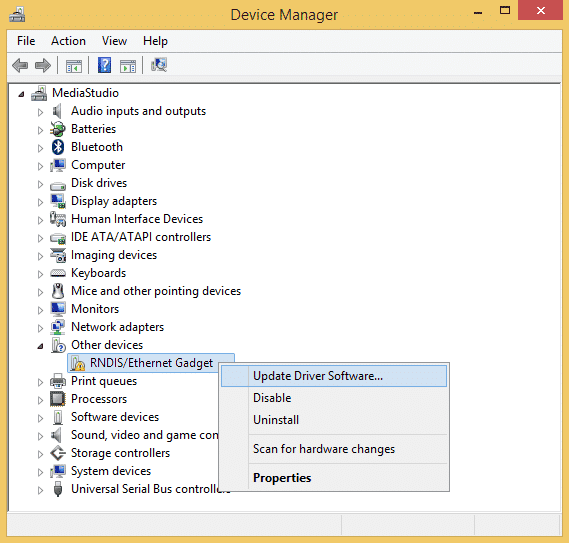
With your Pi Zero still connect to your computer, navigate to the Windows Device Manager. Under “Other devices” find “RNDIS/Ethernet Gadget”, and right click on it. Then click “Update driver software” from the menu:
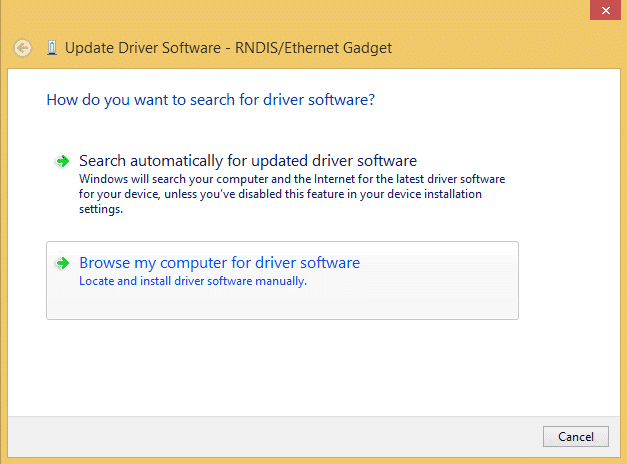
In the next window, select “Browse my computer for driver software”:
Now click “Let me pick from a list of device drivers on my computer”:
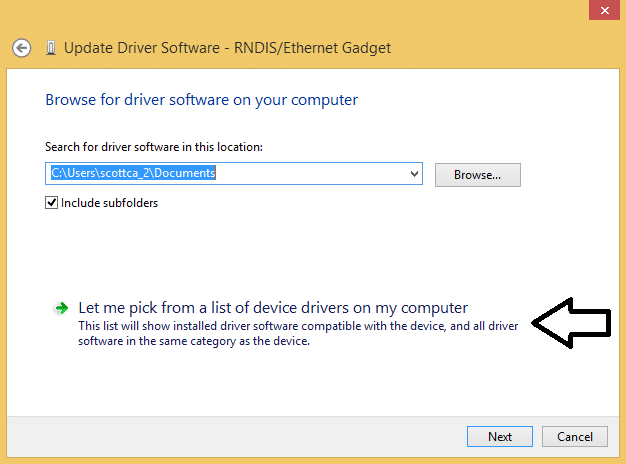
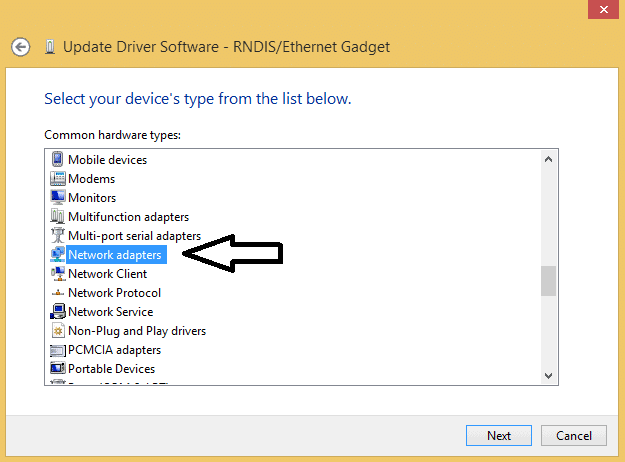
Scroll down the list and select “Network adapters”, then click Next:
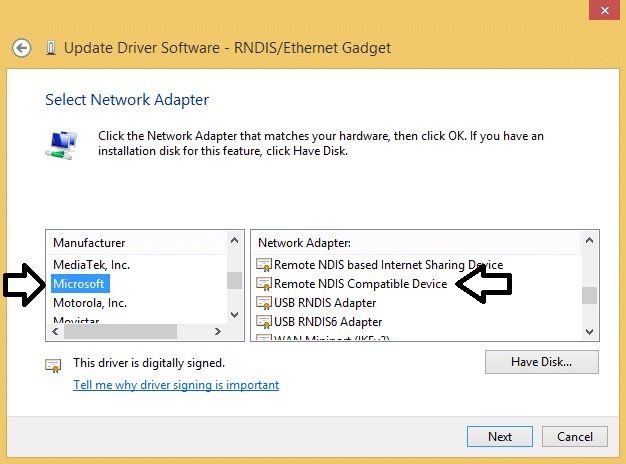
Now scroll down the “Manufacturers” list in the window on the left, and select “Microsoft”. Then scroll down the “Network Adapters” list on the right side window until you find a line that says “Remote NDIS Compatible Device”. Select that, then click Next:
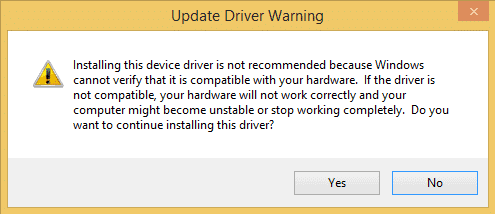
A warning will pop up about Windows not being able to verify the driver, but just click “Yes” to get past it:
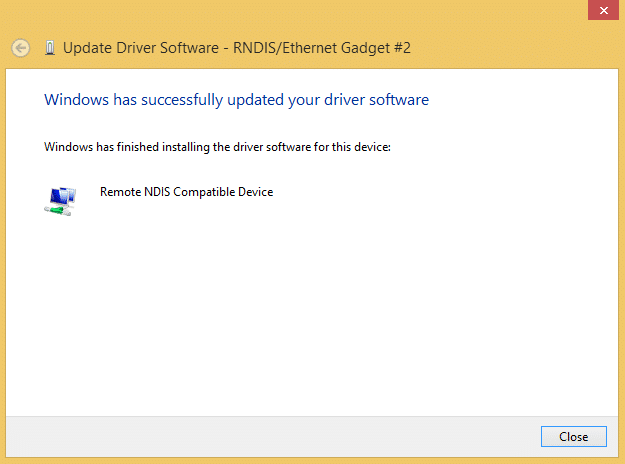
After the driver is finished installing, you should see something like this:
Now try to log into your Pi with PuTTY using the address raspberrypi.local. You should be able to get in:
from: http://www.circuitbasics.com/raspberry-pi-zero-ethernet-gadget/#
driver: https://www.driverscape.com/download/remote-ndis-compatible-device
software: https://support.apple.com/kb/DL999?locale=en_US